Hoe kunnen we helpen?
Importing students
Revisely offers all teachers the possibility to try out full functionality of the application with a demo class with demo students and demo assignments. The best experience is of course when you work with your own students and groups/classes on real assignments. You can simply import your own students in the 3 steps.
Make sure you have a CSV- or XSL-file containing the students’ data before you start. See here an example of the data and format of such a file:

Step 1:
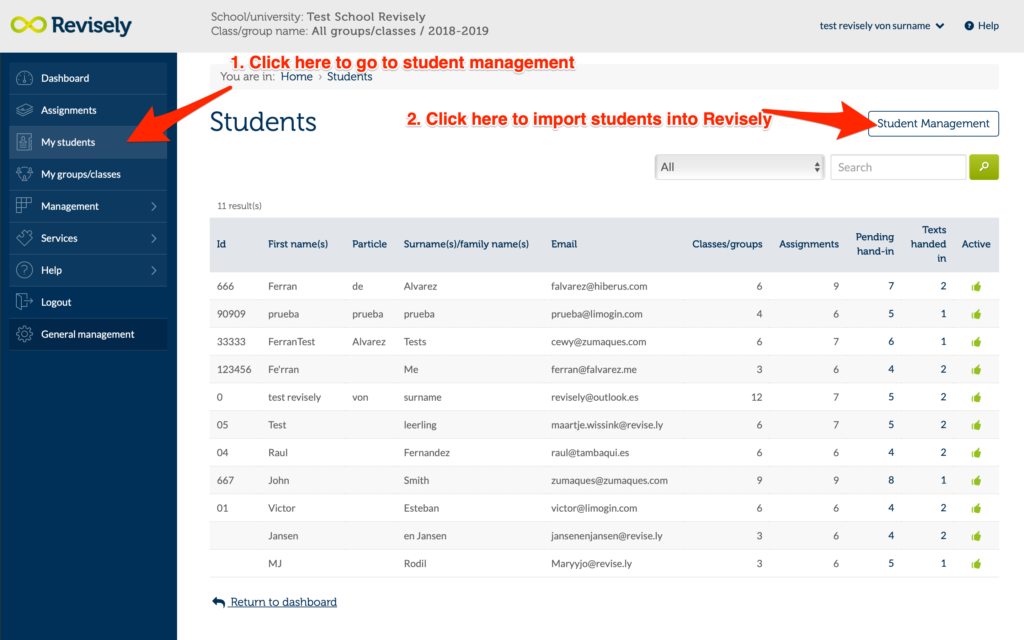
In the menu choose ‘My students‘ and click on the button ‘Student management‘ as in the image below.
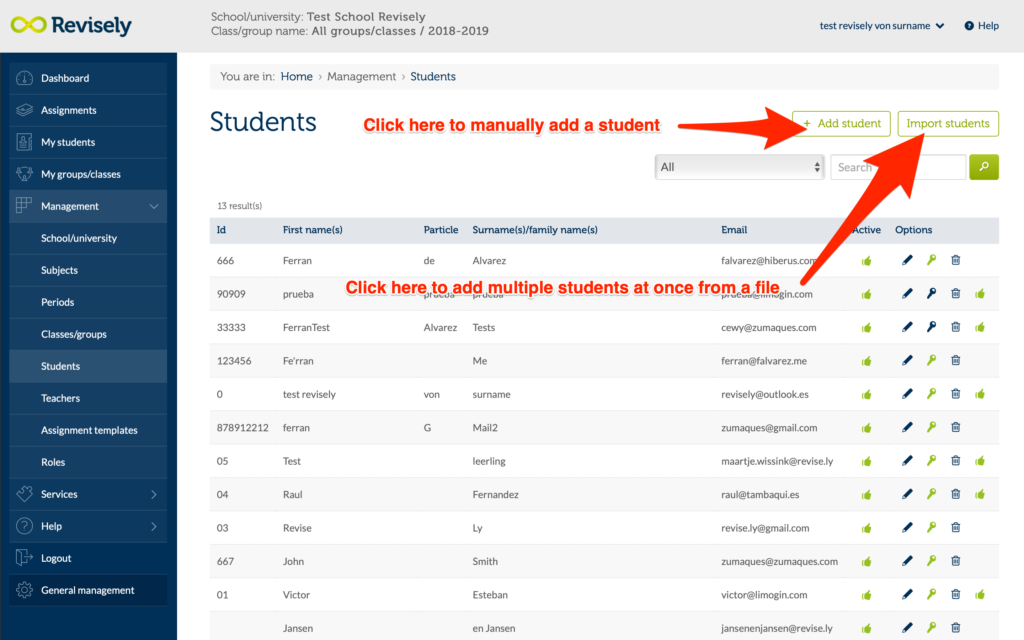
Then there is the option to add one student in Revisely or to import multiple students at the same time. Choose ‘import students‘ as shown in the image below.
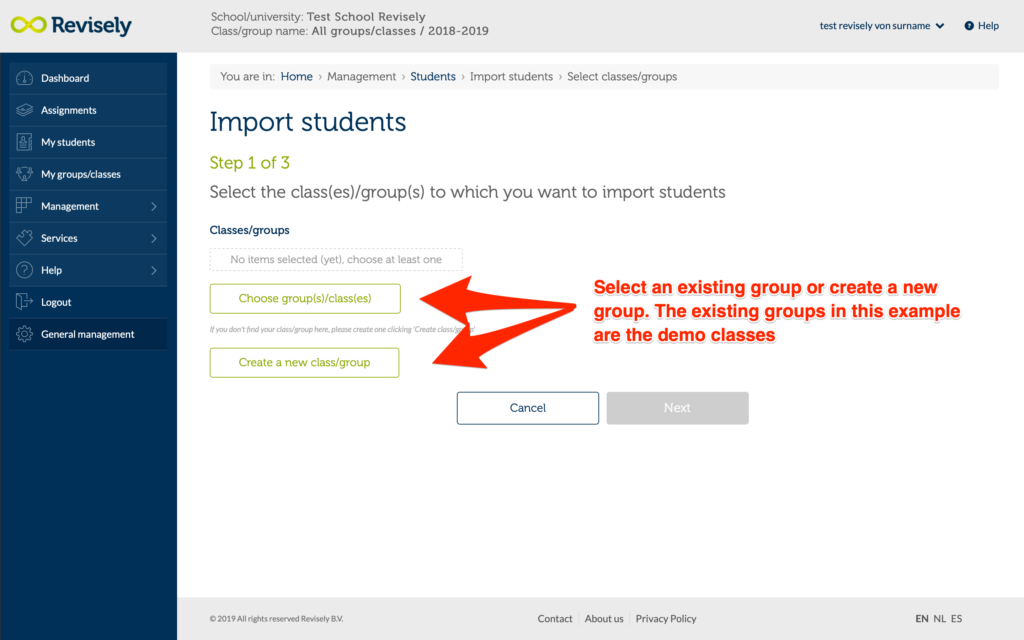
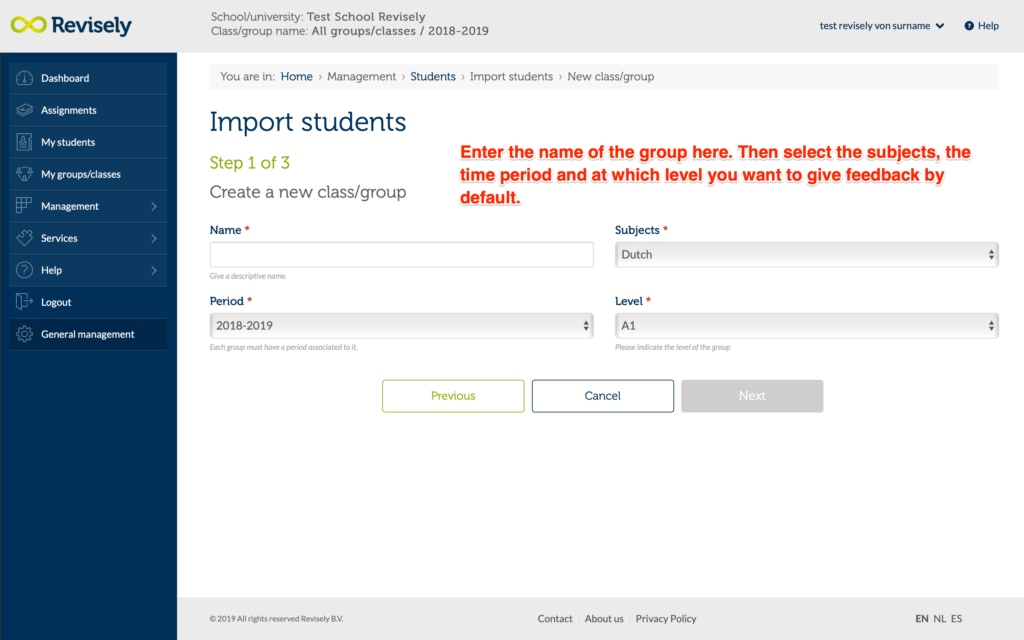
Then select the group(s) in which you want to import the students. Click on the button ‘create a new class/group‘ if the correct group/class is not yet listed. See the images below.
Step 2:
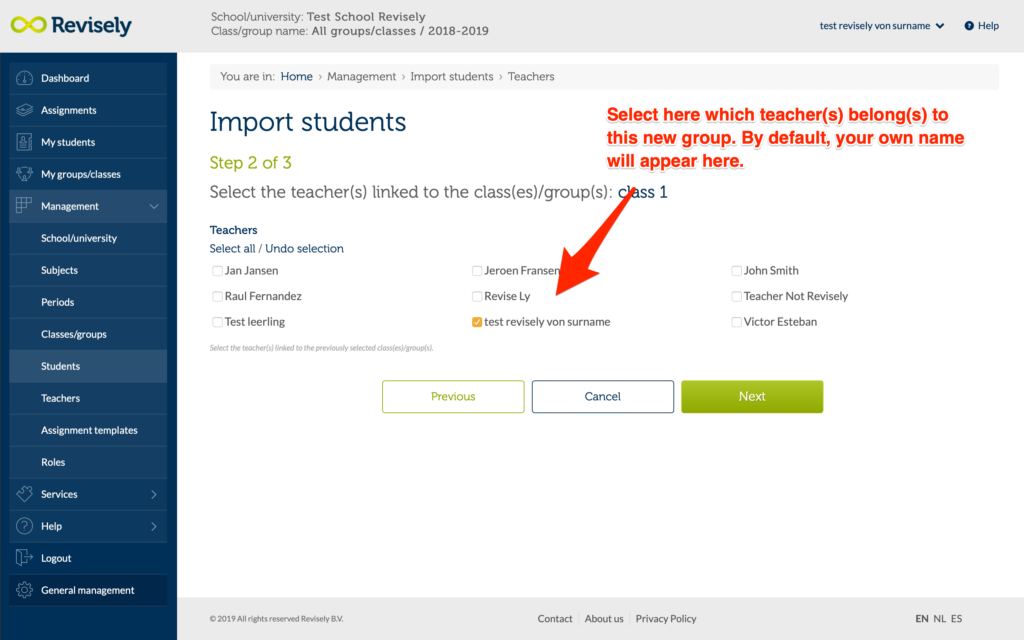
Select the teacher linked to the new class. By default, this is set to your own name.
Step 3:
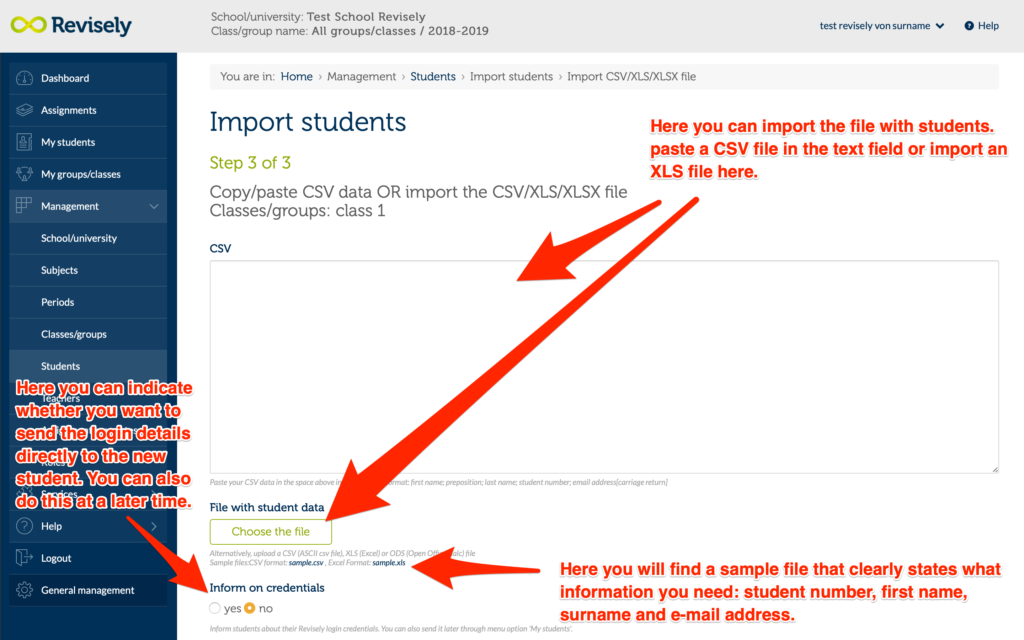
Paste the CSV file into the text field or open the XLS file where ‘Choose the file‘ is written. See also the image below.
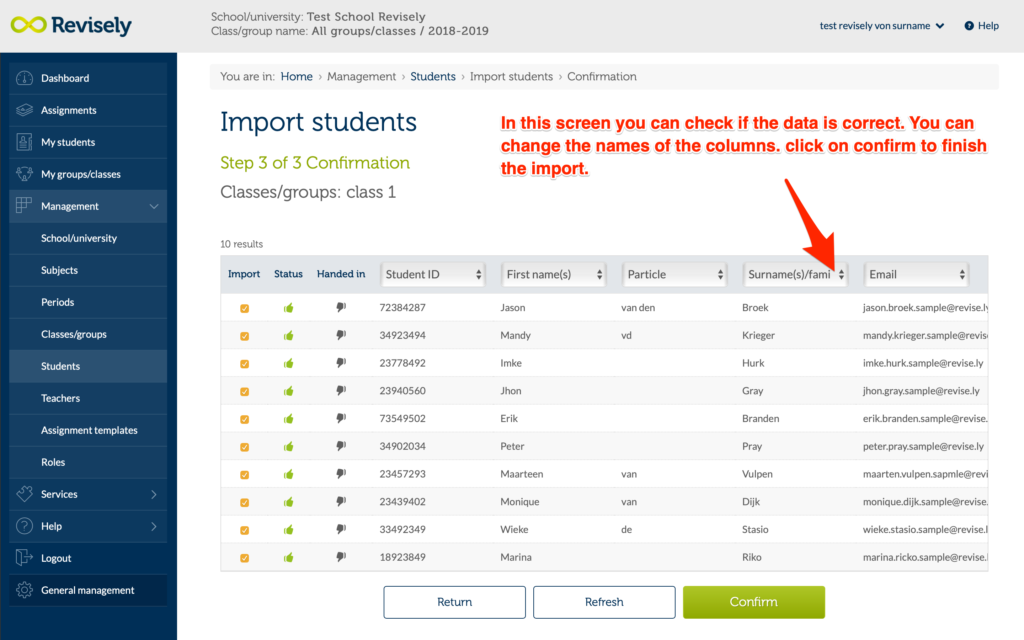
Verify if the data is correctly linked in the following screen. You can change the names of the columns to match the correct information to the correct column.
Done! Your students are now imported into a new group/classroom within Revisely. You can now find the newly created group when creating a new assignment or by selecting in the menu ‘Management’ / ‘Classes / groups‘. This way you can also change your group data again.